Setting up a camera lab
By Henrik Eliasson |
Measuring the image quality of a camera is no small task. If you are setting up a lab for this purpose, there are quite a few considerations to take into account and expensive equipment to buy. You need to think about the room for the lab itself, its size and layout. Then there is the equipment needed, in terms of test charts, light sources, and more. Once that is taken care of, you have the testing procedures and presentation of results to deal with. Let us discuss these points in some detail to get a better understanding of what is needed to perform successful camera measurements.
When it comes to the room where the lab resides, the most important thing is to have full control of the lighting. This means that all outside light must be blocked by means of, ideally, not allowing any windows at all, or, if windows are present, using thick light-blocking curtains and other means to guarantee complete darkness. Furthermore, any unwanted reflections should be avoided by using materials with as low reflectance as possible covering the walls and other surfaces. The size of the lab is certainly important to allow a wide range of shooting distances. For larger camera-object distances or with cameras having very wide fields of view, the size requirements of the room can quickly grow. Another possibly overlooked parameter to consider is the ability to keep environmental conditions like temperature and humidity constant in order to guarantee consistent measurement conditions over time.
Having access to a wide range of light sources could be considered the most important asset in a camera lab. Choosing what types of light sources are appropriate for a certain use case can present a challenge. Even though there are standards, such as those from CIE and ISO, these often describe theoretical illuminants for which there is no clear physical realization. This is true for, e.g., the D series of CIE illuminants that are frequently encountered. This means that if you are out shopping for, say, a D65 source, you will find manufacturers claiming to sell you such illumination. However, on closer inspection you may find that the spectra of these sources are quite far away from what is described in the CIE standard. These light sources may be matching the specification of a D65 source using more crude metrics, such as correlated color temperature (CCT) or color rendering index (CRI). Using only such metrics for the specification of light sources and not having any knowledge of the spectral content, you risk obtaining inconsistent results in measurements when comparing against other labs with different light sources, even with very similar specifications in terms of CCT and/or CRI. Apart from the spectral content of the light, other parameters such as intensity, uniformity and directionality are also very important. Obtaining a high enough intensity can be challenging, especially when measuring high dynamic range cameras. Flicker is another sometimes overlooked artifact that may be invisible to the human eye, but quite apparent in captured images as for instance banding (in the case of cameras with rolling shutter CMOS sensors). The presence of such artifacts can completely obliterate any attempts of obtaining a uniform image.
At least two different types of light sources are often found in a well-equipped camera lab. Larger light fixtures used for illuminating reflective test targets are probably most common. With a reflective chart setup, larger areas can be illuminated for a higher degree of flexibility. Here, uniformity can be an issue. Also, the dynamic range of the test charts is limited. These issues could be overcome using a transmissive source instead, with a backlit transparent test chart. However, the size of these sources is typically limited as well as the range of available types of light.
In order to measure light, there are various types of equipment available. For measuring the amount of light illuminating a scene in units of lux, an illuminance meter is used. To instead measure the amount of light reaching the camera, a luminance meter may be used, giving measurement values in units of cd/m2. To also get some information about the color information from either the light source or the reflected light from a scene, a chroma meter or colorimeter, respectively, is recommended. For even higher accuracy, a spectrometer can provide readings of the full spectrum of the light measured.
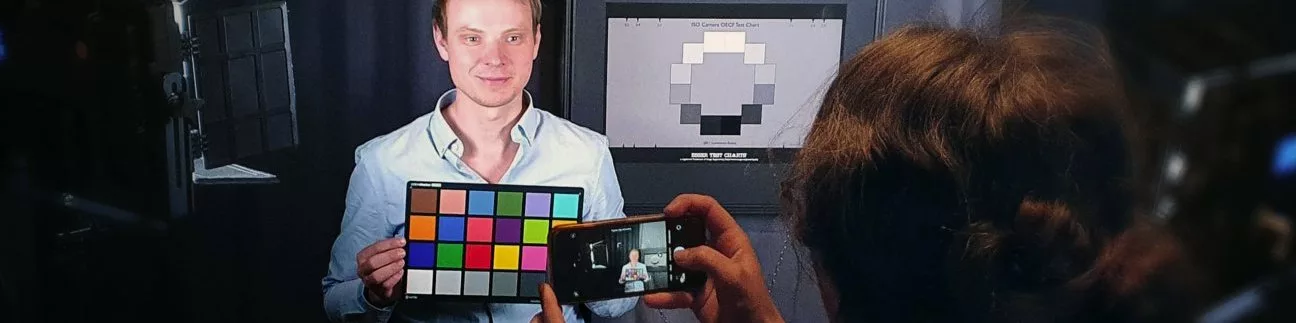
For performing measurements, various types of test charts are necessary. These charts can be purchased from many different sources. The quality of these charts can vary quite a lot and it is certainly important to understand the limitations when it comes to measurement accuracy and reliability. Aspects to take into consideration are spectral reflectance, glossiness, flatness, size and printing resolution. Also, the technique used to manufacture the chart should be considered. For instance, you may find charts using half tone patterns to generate different grey levels. With such a chart you risk getting problems with aliasing and moiré patterns in test images.
Once all the equipment is set up and the lab is working, measurements can begin. To obtain reliable and consistent results, following established testing methodology as described in standards from ISO and IEEE is helpful. From ISO, the TC42/WG18 has issued a wide range of different standards describing methods for measuring sharpness, signal to noise ratio, geometrical distortion, etc. Within IEEE, there are two standards groups working with methods aiming at specific industries, P1858 for mobile imaging and P2020 for automotive imaging. Also within IEC, you can find a standard for surveillance imaging quality.
If you are in need of measuring the image quality of cameras, but don’t have the means or interest in setting up your own lab, do get in touch with us and we would be very happy to help. Even if you already have a lab, it may be beneficial to talk to us to help improve your existing setup. Eclipse has a well-equipped camera lab which provides possibilities to measure the image quality of cameras in many varying conditions.
Examples of parameters we can measure:
- Color reproduction
- Sharpness
- Geometrical distortion
- Color fringing
- Signal to noise ratio
- Dynamic range
- Texture MTF
The lab contains equipment such as:
- Illuminance/chroma meter
- Spectrometer
- A wide variety of light sources, including daylight, incandescent, various LED and fluorescents
Our camera experts have a long-lasting experience in image quality testing, having been active in the development of image quality standards and using their expertise in many product-development projects covering a range of different industries like consumer, automotive and surveillance imaging. So no matter what your problem, we are sure we can help you solve them!
PS: if you want to learn more about this subject, chapter 8 of the book Camera Image Quality Benchmarking by Jonathan B. Phillips and Henrik Eliasson (the latter author from Eclipse) is recommended.